A malfunctioning dishwasher can disrupt your daily life, turning a convenient chore into a frustrating endeavor. Knowing how to troubleshoot common problems can save you time, money, and the hassle of calling a technician. This comprehensive guide will walk you through step-by-step troubleshooting techniques that empower you to quickly fix dishwasher, from drainage problems to electrical failures.
Understand Your Dishwasher’s Basic Components
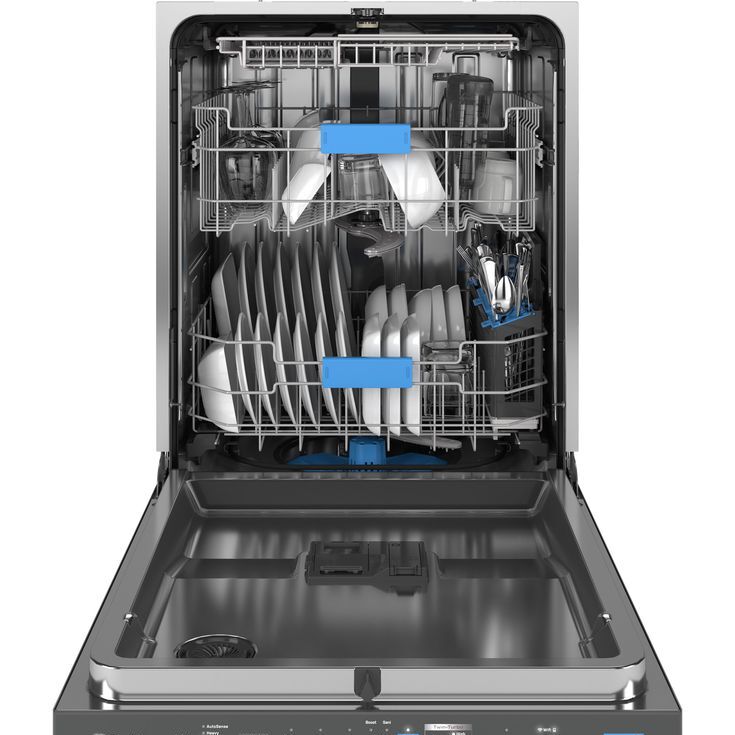
Before diving into troubleshooting, familiarize yourself with your dishwasher’s core components. Modern dishwashers incorporate advanced technology that enhances cleanliness, efficiency, and user convenience. Key parts include the spray arm, filter, pump, heating element, and door latch. The spray arm distributes water to clean dishes, while the filter retains food debris, preventing the spray arm from getting clogged. The pump circulates water through the spray arm, and the heating element heats the water and dries the dishes.
Having a basic understanding of these components plays a critical role in identifying potential issues. If the spray arm doesn’t move, it could indicate a blockage or problem with the pump. You should also pay similar attention to other parts, like the door latch. This component is crucial because it can prevent the dishwasher from operating if it does not secure properly. By understanding these elements, you become more equipped to diagnose problems accurately and implement the right fixes.
Identify Common Symptoms of Dishwasher Problems
Identifying the specific symptoms of your dishwasher’s malfunction paves the way for effective troubleshooting. Common symptoms include improper cleaning, insufficient drainage, strange noises, leaks, and failure to start. A machine that fails to clean dishes effectively may have a clogged filter or a malfunctioning spray arm. On the other hand, a dishwasher that doesn’t drain can attribute its issues to a blocked drain hose, sump, or filter.
Strange noises, such as grinding or rattling, often indicate a problem. For example, dishes may obstruct the spray arms, or the pump motor might be wearing down. Additionally, if the dishwasher starts leaking, it can point to several possible issues. These issues may include faulty door seals, loose hose connections, or even cracks in the tub. Finally, if your machine refuses to power on, the issue could stem from electrical faults, such as the door latch or a blown fuse. By pinpointing these symptoms, you create a more focused approach to diagnosing and resolving the issue.
Step 1: Check the Power Supply
When your dishwasher won’t turn on, you need to check the power supply as your first step. A lack of power can originate from various issues. These include a tripped circuit breaker, a faulty outlet, or even a damaged power cord. Start by inspecting your home’s circuit breaker panel. Look for any breakers that have tripped, especially those related to the kitchen. If you find any, reset them to restore power to the outlet.
If resetting the breakers doesn’t resolve the issue, take the next step. Test the outlet with a different device, such as a lamp or phone charger. This will help you determine whether the outlet itself works properly. If there’s no power at the outlet, the problem lies there.
Next, closely examine the power cord of your dishwasher. Look for any visible damage or signs of wear, such as fraying or cuts. If you see any damage, it’s crucial to replace the power cord immediately. Damaged cords can pose serious fire hazards.
Also, ensure that the dishwasher’s door closes securely. Many models feature safety mechanisms preventing operation if the door isn’t secured. If everything seems intact but the dishwasher still won’t turn on, consider calling a certified electrician. They can investigate deeper electrical issues in your home’s wiring or fix dishwasher, a potential malfunction itself..
Step 2: Inspect and Clean the Filter and Drainage System
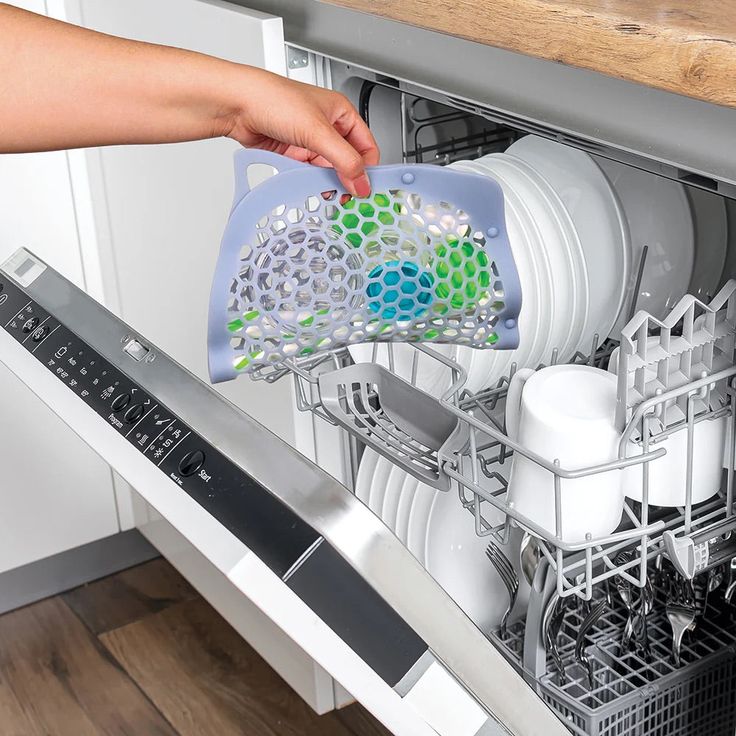
For any dishwasher, an obstructed filter or drainage system can result in significant operational problems. The filter captures food particles and debris, ensuring that water circulates effectively during each wash cycle. To prevent clogs, regularly remove and clean the filter according to the manufacturer’s guidelines. Typically, filters are located at the bottom of the dishwasher, and you can often simply twist or lift them out.
Once you remove the filter, rinse it under warm water to eliminate any residual food particles. Use a soft brush or sponge to scrub stubborn debris. After cleaning, check the drainage system, including the drain hose, for any visible clogs. Look for kinks or bends in the hose that might restrict water flow. If it appears blocked, detach the hose, and rinse it with warm water, using a long brush if necessary. Reattach everything securely and test the dishwasher with a short cycle to see if resolving these blockages rectifies drainage issues.
Step 3: Examine the Spray Arm for Blockages
If your dishes come out dirty even after proper loading, the spray arm may harbor blockages or damage. The spray arm’s function is integral to the cleaning process, as it evenly distributes water throughout the dishwasher. Begin your inspection by checking both the upper and lower spray arms for visible debris or obstructions. Ensure that the spray arms can rotate freely without any hindrance.
To clean the spray arms, unscrew them from their position if necessary. Rinse the parts under running water, using a soft brush to dislodge any gunk trapped in the spray arm’s holes. If the spray arm has any cracks or signs of wear, consider replacing it to restore optimal functionality. Once the spray arm is clean and reattached, run a test cycle with a few dirty dishes. This step will help you verify if the cleaning performance has improved.
Step 4: Troubleshoot Water Supply Issues
Insufficient water supply is another common cause of dishwasher problems. Your dishwasher relies on a consistent flow of water to function correctly. If the machine doesn’t fill with water, the issues could originate from the water supply valve, hose, or the float assembly. Begin troubleshooting by ensuring the water supply valve located under the sink is fully open. If restricted, it can significantly hamper water flow.
Next, inspect the hose that connects the dishwasher to the water supply. Look for kinks or bends that impede water flow. If you notice damage, replace the hose to restore full functionality. The float assembly, located inside the dishwasher, detects water levels and signals the machine to fill. If it gets stuck or clogged, it may prevent filling. Check the float for free movement and clean any debris from around it. Properly addressing water supply issues ensures your dishwasher runs smoothly and gets your dishes sparkling clean.

Step 5: Address Heating Element Problems
A dishwasher relies heavily on the heating element during the wash and drying cycles. If dishes come out wet, cold, or unclean, the heating element might be faulty. Before anything else, run your dishwasher through a heating cycle, listening for sounds that indicate the element is working. Insulation around the heating element should feel warm to the touch; if not, there could be electrical faults.
Once you’ve deciphered that there’s an issue, consider checking the heating element for continuity using a multimeter. Disconnect power from the appliance, remove the heating element, and test for continuity. If the multimeter doesn’t show continuity, replace the heating element. Additionally, be sure to inspect the wiring leading to the heater for loose connections or breakage. Addressing the heating element problems eliminates potential failures, ensuring each cycle cleans your dishes thoroughly and efficiently.
Step 6: Repair Leaks and Seals
A leaking dishwasher can lead to significant water damage over time. Identifying the origin of a leak is crucial for a quick fix. Common culprits include the door gasket, drain hose, and pump seals. Start by inspecting and cleaning the door gasket. Over time, debris can accumulate, hindering the gasket’s ability to form a proper seal. Wipe it down with a damp cloth and ensure it’s in good condition. If cracks or tears appear, replace the gasket to prevent future leaks.
Next, examine the drain hose for loose connections or signs of cracks. If the hose feels worn, replace it. Similarly, check the pump seals, which help keep water contained within the dishwasher. If any deterioration exists, replacing these seals will solve leakage issues. Addressing leaks promptly protects your kitchen from water damage and maintains the functionality of your appliance.
Step 7: When to Call a Professional
While DIY troubleshooting can fix many dishwasher problems, some issues require professional help. If you have carefully followed all the troubleshooting steps, yet the dishwasher still fails to operate, it’s time to seek assistance. A qualified technician can accurately diagnose the problem. Ultimately, getting expert help can save you time and prevent further damage. Furthermore, a qualified technician has the expertise to diagnose complex problems. Thus, enlisting their help can save you time and prevent further damage. Complex electrical failures, internal component malfunctions, and persistent leaks that evade resolution typically warrant a professional examination.
Moreover, if your appliance is still under warranty, it’s wise to contact the manufacturer or an authorized service provider. This step helps ensure you do not void the warranty. Additionally, attempting repairs beyond your expertise can be risky. Such efforts may lead to further damage and negate any potential savings from a DIY approach. Trusting a professional can provide peace of mind and fix dishwasher.
Concluding Thoughts: Mastering Your Dishwasher Maintenance
Learning how to troubleshoot your dishwasher can empower you to solve most common issues independently. Regular inspections and maintenance make a significant difference in ensuring your appliance operates efficiently for years to come. Being proactive in checking filters, sprays, and seals can enhance your dishwasher’s performance. Additionally, this routine fix dishwasher can significantly lower the chances of costly repairs in the future.
Incorporate these maintenance practices into your routine and don’t hesitate to seek professional assistance when challenges arise beyond your expertise. By embracing a hands-on approach, you ensure that your appliance runs smoothly. This proactive attitude frees up valuable time for more enjoyable activities. Moreover, you can turn your attention back to the joys of life. Knowing that you can tackle any dishwasher problems boosts your confidence and peace of mind.